How to Make a Valentine Photo Backdrop for Parties

Valentine’s Day is the perfect excuse to go all out with decorations, and nothing says “party-ready” quite like a DIY photo backdrop. Imagine your friends snapping endless selfies in front of a stunning, heart-filled display that you made yourself! It’s easier than you think, budget-friendly, and adds instant charm to any space. Whether it’s for a birthday, Galentine’s party, or Valentine’s Day bash, a customized photo backdrop is a must-have.
Step 1: Choose Your Space and Size
Before you start gluing and taping, pick a spot that will become your backdrop stage. Consider:
-
A blank wall in your living room or party area.
-
Free-standing frames or collapsible screens if wall space is limited.
-
Space for props or seating in front of the backdrop.
Measure the width and height so you know exactly how much material you’ll need. Bigger is usually better—your guests will thank you when everyone fits in the selfies!

Step 2: Pick a Color Scheme
Valentine’s doesn’t have to be just red and pink—though those classic hues never fail. Mix and match to create a fresh, eye-catching look:
-
Classic: Red, pink, and white.
-
Modern: Rose gold, blush, and cream.
-
Bold: Fuchsia, magenta, and gold accents.
Think about textures too—paper, fabric, and metallics can all play together beautifully. A mix of matte and shiny finishes will make your backdrop pop in photos.
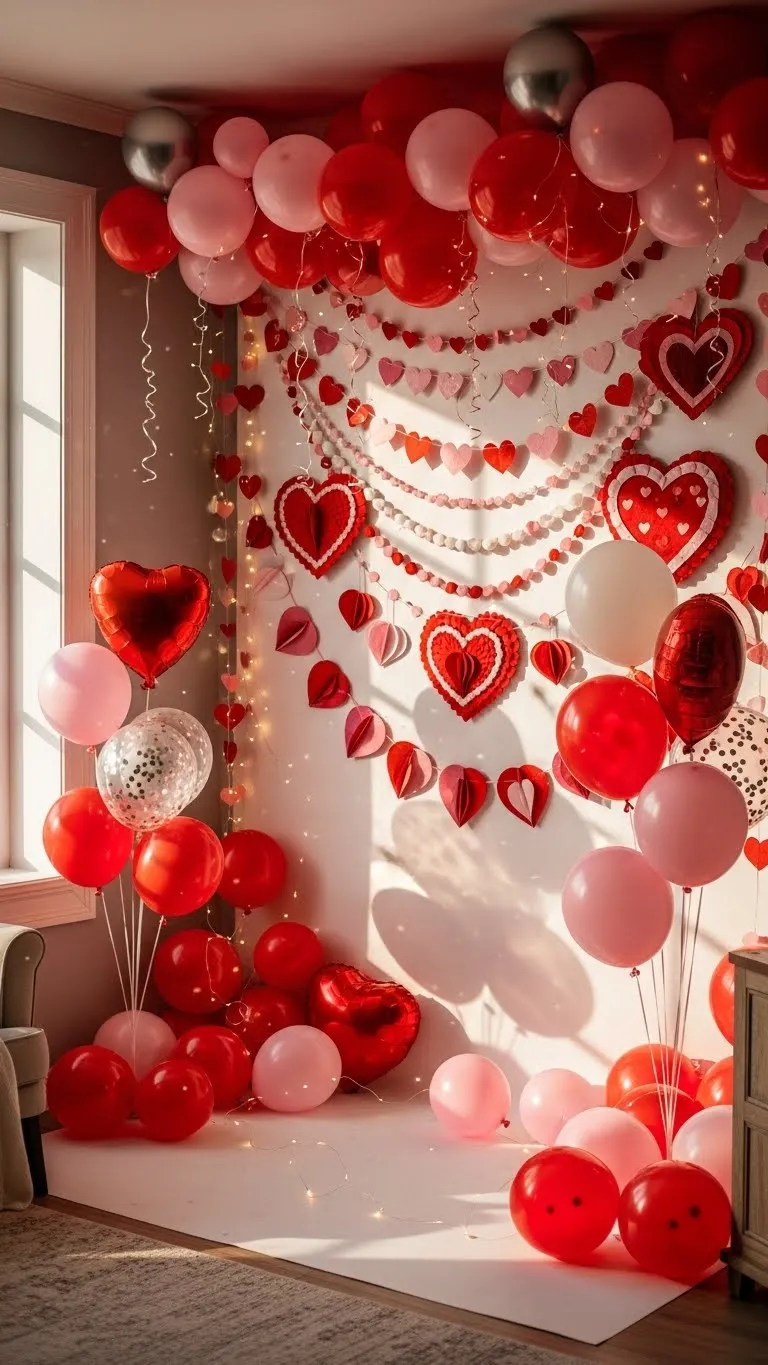
Step 3: Create the Base Layer
The base layer is the foundation of your backdrop and sets the stage for all the decorations. Options include:
-
Fabric: Use a large sheet, tablecloth, or curtain.
-
Paper: Roll out craft paper or tissue paper panels.
-
Balloon Wall: Tape balloons to the wall in clusters.
Secure with double-sided tape or removable hooks to keep things damage-free. For a seamless look, start from the top and work down, overlapping materials slightly for fullness.
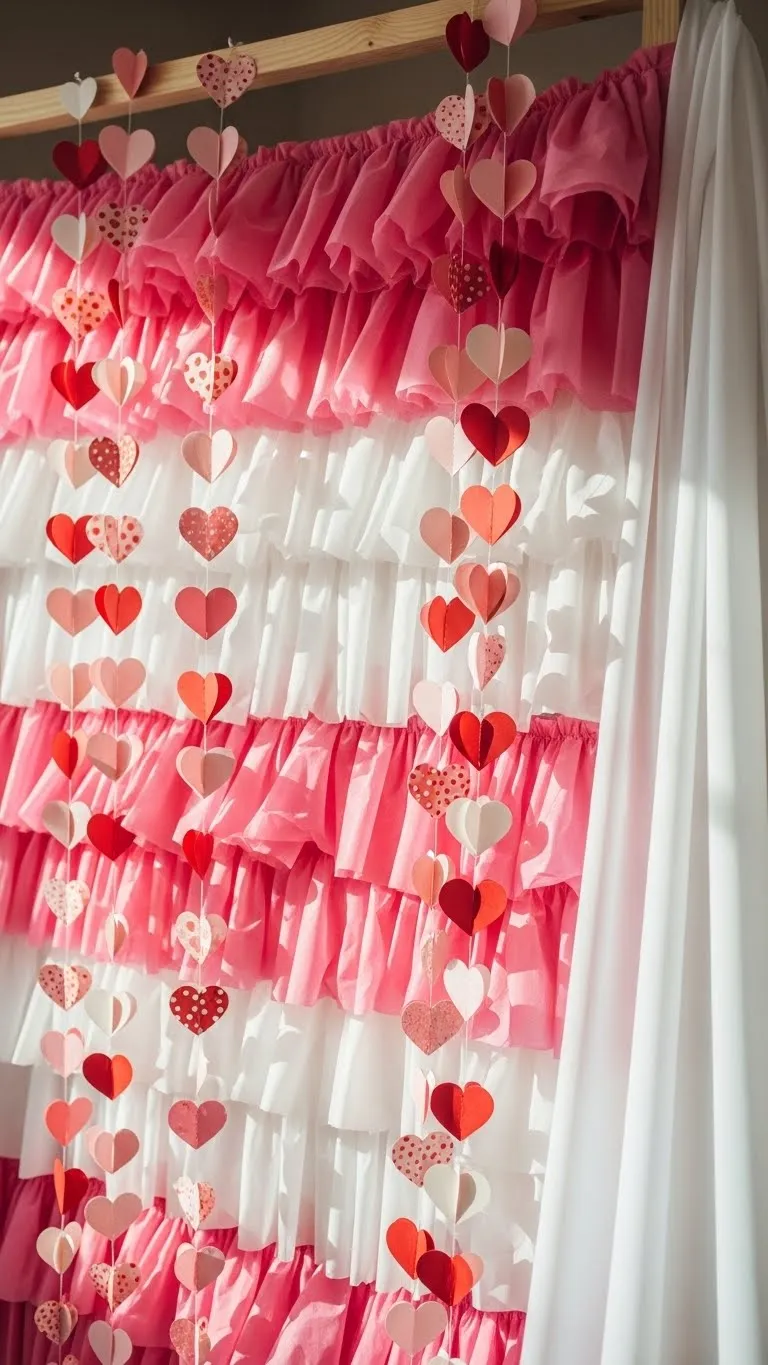
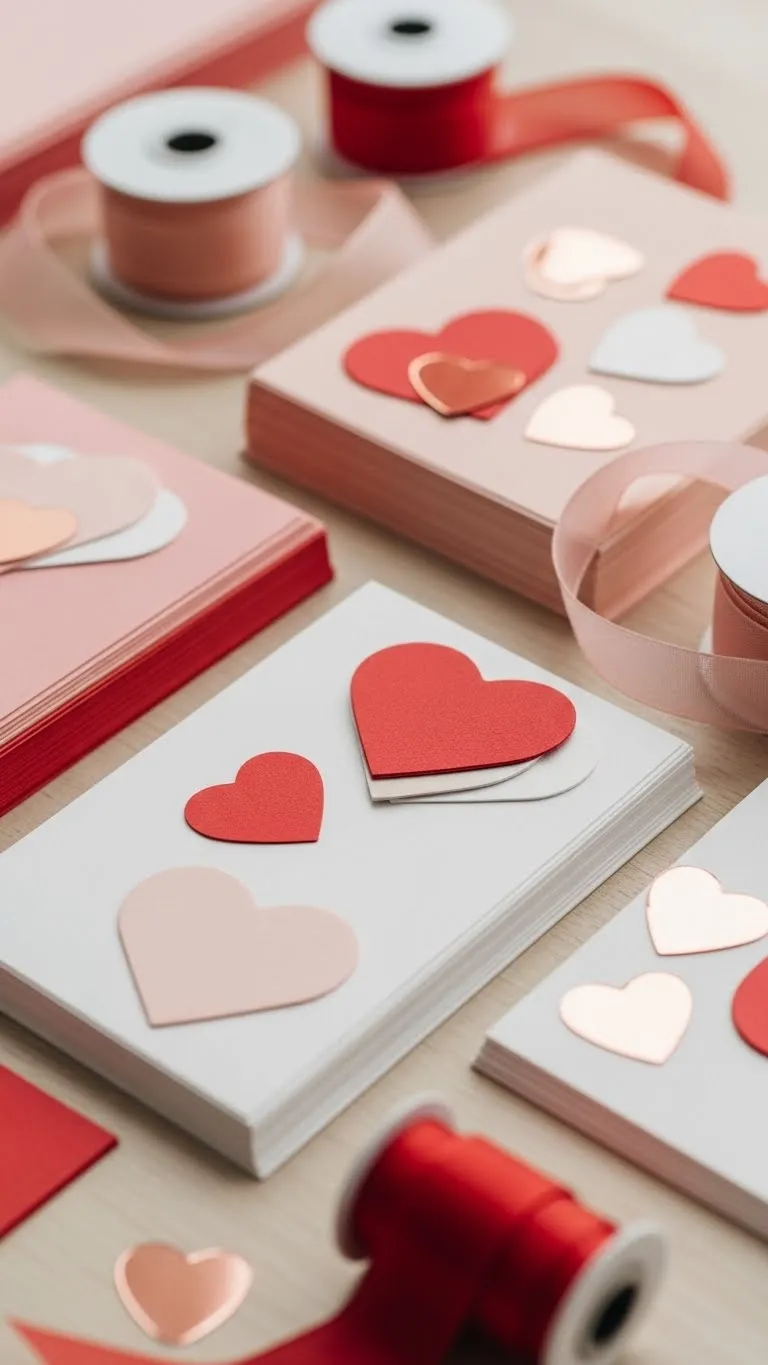
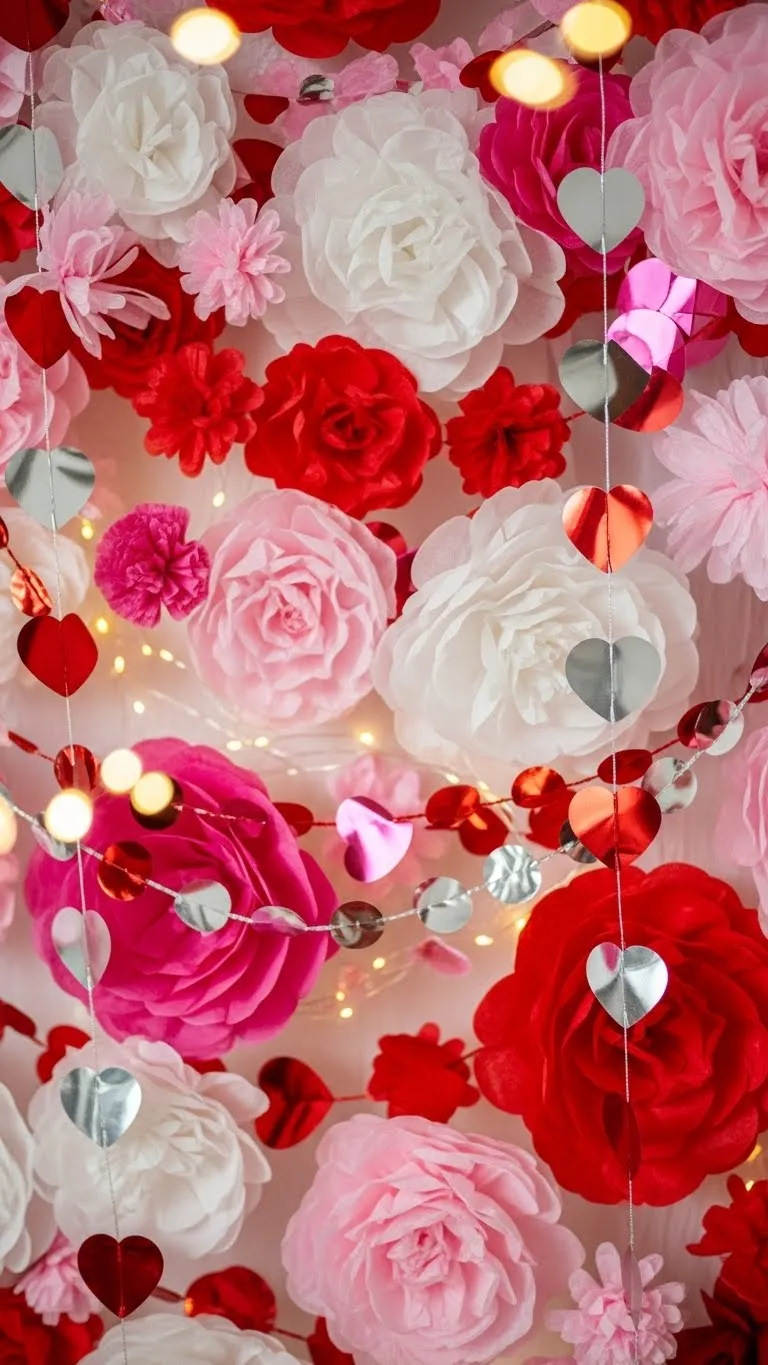
Step 4: Add Decorative Layers
Now comes the fun part—layering your accents! Add dimension and texture using:
-
Paper Hearts: Cut or punch hearts in multiple sizes.
-
Garlands: Tassels, flowers, or beads work beautifully.
-
Fairy Lights: Weave them through paper or balloons for glow.
-
Props: Include frames, heart-shaped signs, or plush pillows.
Arrange pieces asymmetrically for a modern, Pinterest-ready vibe, or keep symmetry for a clean, elegant style.
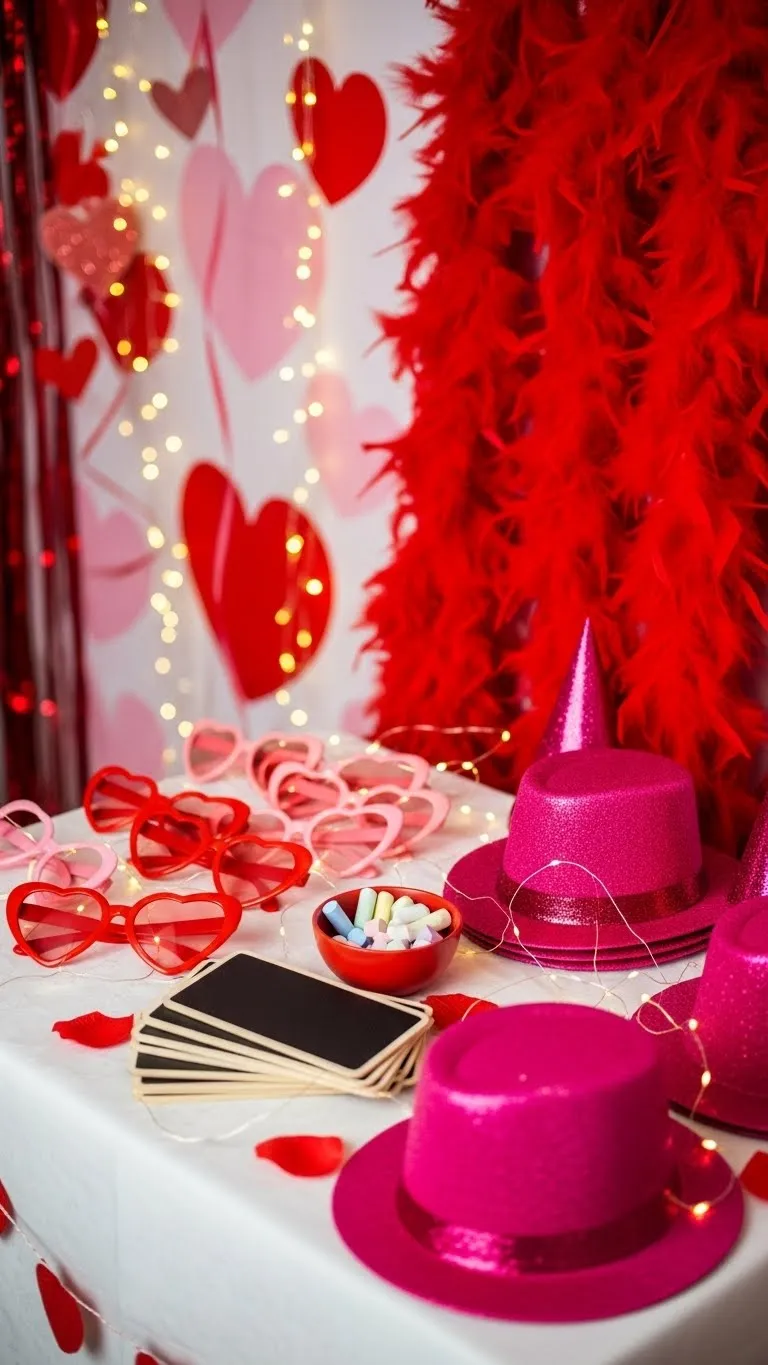
Step 5: Incorporate Fun Props for Guests
Make your backdrop interactive with props that encourage creativity:
-
Heart-shaped sunglasses or masks.
-
Chalkboards or signs with playful messages.
-
Feather boas, hats, or cute hand-held frames.
Place props on a small table nearby or hang them from hooks so guests can grab them easily. This instantly makes your photo area more fun and lively.
Step 6: Lighting Matters
Great lighting turns your DIY backdrop into a professional-looking setup:
-
Natural daylight is ideal if you have a large window nearby.
-
Add soft lamps or string lights to enhance warm tones.
-
Avoid harsh overhead lights that create shadows.
Try a few test shots with your phone or camera before the party starts—small adjustments can make a big difference.
Step 7: Final Touches and Safety Tips
Before the guests arrive:
-
Check that all decorations are securely attached.
-
Keep fragile items out of reach of kids.
-
Sweep the area for loose ribbons or tape pieces to avoid tripping.
-
Add a small rug or cushions if you want a cozy seating area.
A few thoughtful details make your backdrop inviting, safe, and Instagram-ready!
Takeaway
A DIY Valentine photo backdrop is an easy way to elevate your party décor and create memorable moments. By choosing the right space, layering decorations creatively, and adding fun props and lights, you can turn any corner into a photo-worthy stage. Your guests will love snapping pictures, and you’ll get to enjoy a stylish, personalized setup that screams Valentine vibes. So grab your scissors, balloons, and heart cutouts—let’s make this Valentine’s Day unforgettable, one photo at a time!